

The Superscared MADiSON walkthrough will guide you through every terrifying section of the game, showing you where to find crucial items, how to solve each mind-bending puzzle, and where to discover every collectible.
the MADiSON walkthrough is broken down into roughly eleven distinct gameplay sections. Each new area cranks up the horror while introducing fresh puzzles that unravel more of this deeply disturbing story. This walkthrough will lead you step-by-step through all the main locations. We’ll focus on getting you to the next area, cracking the most perplexing puzzles you’ll face, and pointing out every collectible hidden within these creepy halls.
Here is the rewritten walkthrough for the “Escaping Luca’s House” section of Madison, with all mentions of IGN and related information replaced with “Superscared”.
Superscared’s MADiSON Walkthrough Guide to Escaping Luca’s House
Welcome to Superscared’s guide for Escaping Luca’s House in Madison. In this first part of the walkthrough, we’ll cover everything you need to do to leave the room you wake up in and eventually find your way to Grandpa’s House. These initial rooms serve as a tutorial for how you’ll interact with the game’s puzzles moving forward.
Waking Up and Finding the Hammer
You awaken in a dark room, the only light coming from a flickering television. A man, presumably Luca’s father, is furiously banging on the other side of the door. In the sliver of light beneath the door, you’ll see a small tin box on the floor.
- Pick up the Sunbox: This blood-stained box is your first key item. Interact with it to open it and view the disturbing photos of severed limbs inside.
- Locate the Crawlspace: Look for a small crawlspace on the landing behind the TV. You’ll need a handle to open it.
- Find the Handle: The handle is tucked underneath the red leather couch to the left of the main door.
- Get the Hammer: Use the handle on the crawlspace door to open it. Inside, you will find a hammer.
Now, turn your attention to the boarded-up gap in the wall on the right side of the room. Use the hammer on the two middle planks to break them and create an opening. As you squeeze through, the way back will collapse, sealing you in. Continue forward until you reach a door.
Finding Madison’s Camera
You’ll emerge into an abandoned hallway. To your right is a door with two triangle-shaped locks; you won’t be able to open this until much later in the game.
Continue down the hall. As you reach the end, a loud crash will occur behind you. Turn around to see that a large object, a grandfather clock covered by a checkered blanket, has burst through the triangle-locked door. Interact with it to uncover the clock.
With the clock revealed, the second door in the hallway will now be ajar. Head inside. The door will immediately lock behind you. In the center of the room is a wooden chair holding a birthday present, surrounded by candles and blank photos.
The Room with the Present
- Collect The Oval Portrait: On the right wall, grab the ovular painting of a man holding a camera. This will reveal a hole in the wall. Peeking through it, you’ll see a dark room where a TV will switch on, playing a news report about a camera that belonged to a serial murderer named Madison Hale. You will need The Oval Portrait for a puzzle shortly.
- Collect The Study Key: In the same room, you’ll find a gramophone. Open the drawers beneath it to find the Study Key.
- Ignore the Combination Lock: You may notice a crawlspace behind the chair with a combination lock. The code for this is randomized each playthrough and can only be found at the very end of the game. Ignore it for now.
- Open the Birthday Present: Interact with the present on the chair to receive an old instant camera. This is your most important tool.
- Take a Picture: Use the instant camera to take a photo of the chair. The photo will develop, and the scene will change—the lightbulb above becomes a noose, and the chair turns to face the locked crawlspace.
The door to the hallway is now unlocked again.
The Grandfather Clock Puzzle
Exit back into the hallway and walk towards the end. The lights will cut out, and candles will appear. The covered grandfather clock will be back. Interact with it, and it will disappear.
- Find the Nail: With the clock gone, try to hang The Oval Portrait on the empty spot on the wall between the two sconces. Luca will note that he needs a nail. The grandfather clock will reappear, once again blocking the triangle-locked door. Uncover it, and you’ll find a nail stuck in its face.
- Hang the Portrait: Grab the nail and use it to hang The Oval Portrait on the wall.
- Take Another Picture: Snap a photo of the hanging portrait with your instant camera. The room will shake, and the portrait’s glass will shatter. When you look at the developed photo, you’ll see the man in the portrait is now pointing directly behind you.
Turn around. A door that wasn’t there before has now appeared. Use the Study Key you found earlier to unlock it.
Dad’s Study and the Path to Grandpa’s House
This new room is the one you saw through the hole in the wall. You can find newspaper clippings here detailing the Madison Hale murder case.
- Find the “J” Key: Next to the TV, pick up a box of matches. Inside is a small key labeled with the letter “J”.
- Photograph the Pentagram: On the wall to the right of the Storage Room door, you’ll see a strange pentagram-like drawing with three empty circles. Take a photo of this drawing. The developed photo will reveal three unique symbols inside the circles.
- Open the Storage Room: Use the “J” key to open the Storage Safe in the adjacent Storage Room.
- Get Luca’s Notebook: Inside the safe, take Luca’s Notebook. You’ll see drawings of instant photos labeled “Sister’s Leg”, “Mom’s Arm”, and “Dad’s Head”. The safe can now be used to store any items you don’t need.
- Find Cassette #1: Next to the safe, pick up Cassette #1. Check the drawers beneath the safe for a note from a priest.
Once you have collected Luca’s Notebook, a door behind the storage shelves will open, revealing the path to Grandpa’s House.
Grandpa’s House
Welcome to Superscared’s walkthrough of the first section of Grandpa’s House in Madison. Now that you’ve escaped Luca’s House and the threat of his furious father, you’re free to explore the eerie, abandoned home of Luca’s grandfather. Here, you’ll uncover that Luca’s father was corresponding with Priest Thomas in hopes of curing demonic possession.
Power Loss and Cassette #1
Upon entering the dining room, you can attempt to interact with the cassette player to listen to Cassette #1. However, before you can do so, the power cuts out. You’ll need to head to the basement to restore electricity.
Restore Power to Grandpa’s House
Walk past the cassette player and the voicemail machine. As you progress through the hallway, you’ll notice that the door to Grandma and Grandpa’s Room is locked.
To the left is a bathroom. Inside, you’ll find a rusted mirror you can flip, revealing the chilling message:
“Blue Knees is real.”
Next to the mirror is a bathtub, and hidden on the wall in the shadows is a Red Collectible Photo.
Bathroom Note & Clues
Also in the bathroom, you’ll find the toilet chained shut—it can’t be opened until much later when you acquire the Bolt Cutters.
On a shelf beside the toilet, there’s a notepad with the following clue:
“Combination… right… 8 left.”
Keep this hint in mind for a future puzzle.
Solving the Fuse Box Puzzle
At the end of the hall, you’ll find stairs descending into the basement. At the bottom, enter the Generator Room, where you’ll encounter the Fuse Box Puzzle.
This puzzle must be solved by flipping switches to the correct “on” or “off” positions. If you get the order wrong, the puzzle resets. The solution is randomized each time, so trial and error is required.
Once you’ve aligned the fuses correctly, you’ll be able to restart the generator.
Continuing past the Generator Room reveals more of the basement, including the mysterious Red Door—though you won’t be able to interact with it just yet.
Explore the House
With the lights back on, exploring the house becomes easier.
In the kitchen, check the cupboard left of the oven to find the first Triangle Key. This can unlock one of the Triangle Locks on the door back in Luca’s House.
💡 Note: The cupboard above the oven is also chained shut and can only be opened using the Bolt Cutters found later in the game.
Above the doorway to the dining room, you’ll find a Red Collectible in Grandpa’s Kitchen.
Also, above the doorway leading from the kitchen to the living room, there’s another Red Collectible.
Play Cassette #1
Now that power is restored, return to the dining room and play Cassette #1 on the cassette player. Priest Thomas will speak about demonic possession, hinting that cockroaches act strangely around supernatural phenomena.
Be sure to take note—unusual cockroach activity will serve as a clue as you continue your exploration.
After listening, Luca will experience his first vision. You can view a drawing of this vision—a Red Door—in Luca’s Notebook.
The Red Door
Return through the Generator Room in the basement. Follow the hallway until you reach a shelf, where you can pick up the Solar Medallion featuring Jupiter and Mars.
Squeeze through a tight gap in the wooden structure to enter a new passageway. This will lead you to a locked Red Door, surrounded by blank instant photos.
Use your instant camera to take a picture of the door. Once developed, you’ll see the Red Door marked with crime scene tape.
Open the door to enter the next chilling chapter: The Well.
The Well
Welcome to Superscared’s walkthrough for The Well section in Madison. After opening the Red Door in the basement, you now find yourself standing before a sealed well. Prepare for puzzles and jumpscares as you descend into the dark world crafted by Madison Hale.
Entering The Well
Inside the Red Door, you arrive in a large, dark, and empty room. A path marked by crime scene tape and flickering candles guides you to a locked stone well, which is surrounded by instant photos.
How to Solve the Well Lock Puzzle
-
Locks and Symbols:
On the well, there are three locks that correspond to the pentagram displayed on the wall in Dad’s Study. Use the instant photo of the pentagram to match each symbol in its respective circle to the corresponding locks on the well.
Note: The symbols for this puzzle are randomized each playthrough. The example below illustrates one correct solution. -
Activating the Well:
After you have turned each of the three locks to the correct symbol, take a photo of the well using the instant camera. The top of the well will shatter, and the developed photo reveals the same pentagram drawn on its underside. -
Descending:
With the puzzle solved and the well opened, you can now descend the ladder to the bottom.
How to Complete the Walkie-Talkie Scene
-
Entering the Flooded Room:
After descending the well, walk through the passageway into a flooded concrete room. Here, against one of the four pillars, you’ll discover the Moon Box. Although it is rusted shut at the moment, it can be opened later. -
Crime Scene Clues:
Once you pick up the Moon Box, you’ll find that the door you came through is now sealed with crime scene tape. -
Collectibles:
As you step inside the flooded room, look to your right where you will find a Red Collectible on one of the pillars. -
The Walkie-Talkie:
Approach the sealed door and retrieve the walkie-talkie floating in the water before it. On inspection, you learn that the device belonged to Officer Russell—an officer mentioned in news clippings from Dad’s Study as the one who shot Madison Hale after a failed attempted arrest. -
Activating the Chatter:
Walking back toward the pillars with the walkie-talkie in hand causes the lights to dim. When they return, you’ll notice crime scene tape now encircling the pillars, trapping you inside. -
The Choreography of Light and Sound:
Observe the darkness around the pillars—the walkie-talkie’s chatter and the blinking of its red light change speed based on your position.
Find the spot where the device’s response is the fastest, and snap a picture of that area in the darkness using your instant camera. The flash will reveal Madison in a sudden jumpscare; however, the developed photo will appear blank and stained with blood. -
Triggering Officer Russell’s Message:
Repeat this process one more time, and Officer Russell’s voice will begin speaking through the walkie-talkie. She will recount her discovery of the well in Madison Hale’s house, detailing the finding of severed limbs belonging to missing victims, and her confrontation with Madison. -
Final Photo and Transition:
Once the cutscene concludes, the chatter resumes. Take one final photo of the darkness where the walkie-talkie reacts most intensely.
How to Solve the Red Doors Puzzle
-
Triggering a Jumpscare:
The third photo initiates another jumpscare, and you black out. When you regain consciousness, you are surrounded by countless Red Doors. -
Navigating the Doors:
You can open any of these doors to step out into a vast, empty darkness. While you may notice instant photos scattered around the doors, snapping a photo of these in their current state will have no effect. -
The Exit Strategy:
To exit this maze, you must open every single door. As you do so, the lights will flicker off, and upon reappearing, all the doors will be locked. Take a photo of this setup, and watch as the false doors collapse, revealing a single true door that opens back into the basement of Grandpa’s House.MADiSON Walkthrough – The Attic Puzzle (Madison Walkthrough)
Objective:
Solve the attic puzzle by collecting and correctly placing four family portraits to equal the number 43. Complete additional steps to unlock hidden rooms and puzzles throughout Grandpa’s House.
Entering the Attic:
-
After escaping the well and completing the Red Door puzzle, Luca has a second vision — a sketch of an attic with a ladder.
-
Head toward the Virgin Mary statue near the kitchen. The attic hatch will now be ajar, and the ladder will drop automatically.
Attic Puzzle Setup:
-
You’ll find four empty picture spots on the walls, shaped: Circle, Square, Diamond, Hexagon.
-
A morbid clue on the back of a photo reads:
“Age is just a number… but at the end… you die anyways.” -
Scribbles on the walls hint at basic math (addition/subtraction).
Portrait Locations:
-
Diamond Portrait – Giovinna Maxwell (56 years old)
-
Found on the floor near diamond slot.
-
-
Square Portrait – Albert Maxwell (5 years old)
-
Found to the right of diamond slot.
-
-
Circle Portrait – Pascual Maxwell (33 years old)
-
Found later in Grandpa’s Office.
-
-
Hexagon Portrait – Filomena Maxwell (68 years old)
-
Found behind a sliding door unlocked via the Solar Medallion puzzle.
-
Get the Heart Key:
-
Grab the Heart Key hanging from a beam near the attic bed frame to access Grandma & Grandpa’s room.
Creepy Broadcast:
-
Exiting the attic triggers a news report repeating “43… years old woman… was killed…” — referring to Madison Hale.
Explore Grandma & Grandpa’s Room:
-
Find Grandma’s Diary in the wardrobe to learn about Blue Knees and her deteriorating vision.
-
Pick up the Old Film Slides from the locked side of the wardrobe (door is unlocked now).
-
In the attached bathroom, find the Gold Plaque for the Solar Medallion Puzzle.
Use the Slide Projector (Home Theater Room):
-
Use the Old Film Slides with the slide projector.
-
After the flickering sequence, a Solar Medallion appears on the wall. Take a photo of the projection to materialize it.
-
The developed photo shows 6 planets — this becomes your Solar Medallion puzzle solution.
Solve the Solar Medallion Puzzle:
-
Collect all three Solar Medallions:
-
1 in Grandpa & Grandma’s bathroom (Neptune & Uranus)
-
1 in the home theater (Venus & Mercury)
-
1 in the Red Door basement path (Jupiter & Mars)
-
-
Use the instant photo of the six planets to arrange the medallions on the golden plaque.
-
When correct, the sliding door opens behind the bedroom wall.
-
Use the Hammer to remove boards and enter.
-
Shrine & Hexagon Portrait:
-
Inside the shrine, pick up the Hexagon Portrait – Filomena Maxwell (68 years old).
-
You also find a silver locket behind a crawlspace door.
Solving the Attic Puzzle:
-
Return to the attic with all four portraits.
-
Take instant photos of each empty frame — each reveals a hidden number.
-
Match each portrait’s age to a frame so the math adds/subtracts to 43.
Correct Pairings:
Portrait Age Number Needed Placement Albert Maxwell 5 +38 Square Giovinna Maxwell 56 –13 Diamond Pascual Maxwell 33 +10 Circle Filomena Maxwell 68 –25 Hexagon ⚠️ Note: Frame numbers are fixed, but their locations vary per playthrough.
Return of the Red Door:
-
After correct placement, the Red Door reappears through the attic wall gap.
-
Collect the Golden Lighter before entering the Red Door.
End of MADiSON walkthrough – Part 1
MADiSON is trending again in 2025 thanks to horror fans, Twitch streams, and YouTube Let’s Plays. This video is perfect for those searching for: “MADiSON full game walkthrough” “best horror games 2025” “psychological horror gameplay with commentary” “scary puzzle games like Visage and PT” GAME DETAILS Game: MADiSON (by BLOODIOUS GAMES) Release: Updated & re-trending in 2025 Format: 4K | Pure Atmospheric Horror Tags: Haunted house, cursed camera, survival horror, jump scares, escape room puzzles
-


About the author

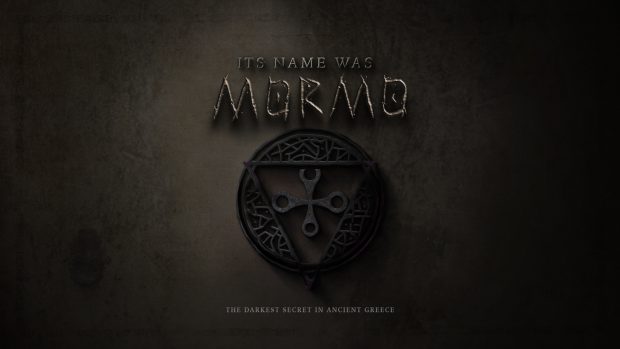
‘Its Name Was Mormo’ Review: Fear-filled Hearts & Close Encounters
In Mark Bower’s staggering handmade visionary tale, his first movie has drawn the attention of nine international film distributors. A Haunting Tale Mark Bower's handmade visionary performance, "Its Name Was Mormo," is a haunting exploration of fear and the supernatural, capturing audiences with its raw and immersive storytelling which delves into the realm of psyche horror, evoking a sense of dread that lingers long after the camera battery dies. Plot and Atmosphere Set in a desolate, rural town, Its Name Was Mormo > follows the unsettling experiences of a family who encounter an evil entity known as Mormo. The film masterfully builds tension through its eerie landscapes, unsettling silence, and the palpable fear of its characters. Bower’s attention to detail in creating a chilling atmosphere is evident, as each scene is infused with an impending sense of doom. The narrative is […]

Into the Fog: Everything We Know About Return to Silent Hill
After nearly two decades, the sirens are sounding once again. Return to Silent Hill, the highly anticipated third instalment in the film franchise, is officially set to bring the psychological horror of Konami’s legendary video game series back to the big screen. Directed by Christophe Gans, the visionary behind the original 2006 cult classic, this new entry promises a faithful and terrifying adaptation of the fan-favorite story, Silent Hill 2. https://www.youtube.com/watch?v=fTPHkslPCr0 The Release: A New Nightmare for 2026 While initially expected earlier, the official domestic release date has been set for January 23, 2026. This places the film at the forefront of the year's horror calendar. International audiences in territories like Australia and Brazil can expect to enter the fog a day earlier on January 22, 2026. The Plot: A Journey of Love and Madness The film adapts the narrative […]

Top 10 Console Games: Horror Games You Must Play in 2026
Top 10 Console Games: Horror Games You Must Play in 2026 From legendary remakes to grotesque new nightmares, prepare your PS5 and Xbox Series X for a golden age of terror. The horror genre is currently enjoying a renaissance. We’ve moved past the era of cheap jump-scare YouTube bait and settled into a rich landscape of psychological dread, complex survival mechanics, and narrative-driven terror. For console gamers, the horizon is looking exceptionally grim—in the best way possible. The next 18 months are stacked with titles designed to make you clutch your controller until your knuckles turn white. We are looking at the return of industry titans, ambitious new IPs from legendary creators, and indie darlings making the leap to the big screen. If you’re ready to lose some sleep, here are the top 10 console horror games coming out soon […]

ILL: From Viral Concept to Brutal Reality – Development & Release Update (2026)
For years, the horror game ILL existed in the liminal space between "too good to be true" and "wishlisted immediately." Known for viral clips featuring hyper-realistic dismemberment and flesh-mutating monstrosities, the project faced years of skepticism. The latest ILL Update brings exciting new details to light. The latest ILL Update showcases the game's evolution and development progress. This ILL Update marks a pivotal moment for fans eager for insights. However, recent updates from late 2025 have fundamentally changed the narrative. No longer just a series of glossy animations, ILL has entered full active production with a major publisher backing it. Here is the latest ILL Update on the body-horror title that aims to redefine the genre. 1. Major Publisher Announcement: The Mundfish Partnership In this ILL Update, the focus is on the exciting partnership that influences gameplay. This ILL Update […]
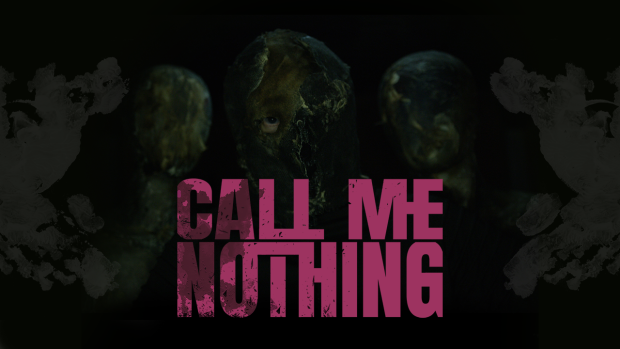
Call Me Nothing: New Psychological Thriller Unmasks Trauma and Mental Health
Call Me Nothing, produced and directed by Mark Andrew Bowers, is digging into the messy, unglamorous corners of the human mind—and inviting the community to join the journey. This gripping psychological thriller uses the Japanese idea of "three faces" as its central motif: the face we show the world, the face we reserve for loved ones, and the face we keep hidden. It’s a gritty, "slow-burn" story about memory, loss, and the fight to reclaim one's identity. A Story of Three Faces Shot in remote forests and abandoned villages, the production has already completed more than 50 days of filming for just the opening twenty minutes. The team, led by Marcela and Mark Bowers, is now live on Indiegogo seeking $300,000 to complete post-production, sound, and global distribution. But this campaign is about more than just finishing a film. It’s […]

Scary Story – Tequendama Falls
The Cry Beneath the Falls The Haunted Horror of Tequendama Falls and Hotel del Salto They say the water never forgets. South of Bogotá, Colombia, hidden in the Andean mist, Tequendama Falls crashes 515 feet into a chasm carved by time. It's breathtaking. It’s sacred. It’s cursed. The locals don’t come here after dark. They say the wind carries screams — not from the rocks, but from the souls who leapt. The ones who never left. And if you dare listen closely...You’ll hear her crying. Night One Elena arrived with a backpack, a DSLR, and an unhealthy obsession with forgotten places. Her hostel room overlooked the crumbling bones of the infamous Hotel del Salto — a colonial-style mansion turned hotel, then museum, now mostly a shell clinging to the edge of the abyss. “People used to jump from the windows,” […]
MADiSON Walkthrough | 2025 Horror Game | 4K 60FPS
The Superscared MADiSON walkthrough will guide you through every terrifying section of the game, showing you where to find crucial items, how to solve each mind-bending puzzle, and where to discover every collectible. the MADiSON walkthrough is broken down into roughly eleven distinct gameplay sections. Each new area cranks up the horror while introducing fresh puzzles that unravel more of this deeply disturbing story. This walkthrough will lead you step-by-step through all the main locations. We'll focus on getting you to the next area, cracking the most perplexing puzzles you'll face, and pointing out every collectible hidden within these creepy halls. Here is the rewritten walkthrough for the "Escaping Luca's House" section of Madison, with all mentions of IGN and related information replaced with "Superscared". Superscared's MADiSON Walkthrough Guide to Escaping Luca's House Welcome to Superscared's guide for […]
Related

The Complete Saw Franchise Is Now Streaming on Peacock: A Definitive Guide for Horror Fans
Horror fans have a major reason to celebrate. One of the most influential and brutal horror series of the 21st century is now easier than ever to revisit. The entire Saw franchise is officially streaming on Peacock, giving viewers instant access to all ten films in the iconic saga. Whether you’re a longtime fan of Jigsaw’s twisted philosophy or a newcomer ready to experience the traps for the first time, this is the perfect opportunity for a full franchise marathon. This streaming milestone comes on the heels of one of the biggest horror industry stories of recent years: Blumhouse’s acquisition of the Saw franchise in 2025, which reunited original creators James Wan and Leigh Whannell with the property that launched their careers. With renewed creative energy behind the scenes and renewed accessibility on streaming, Saw is once again dominating the […]

‘The Mummy’ Lee Cronin and Blumhouse Resurrect the Classic Monster for an April 2026 Release
The director of Evil Dead Rise is bringing a terrifying, horror-first approach to The Mummy, leaving the action-adventure style behind. Universal Pictures is taking another stab at their classic monsters, and for The Mummy (2026), they have recruited one of the most exciting voices in modern horror: Lee Cronin. After the massive success of Evil Dead Rise, Cronin has been tapped to write and direct a new version of The Mummy, set for release on April 17, 2026. This is not a sequel to the Brendan Fraser films, nor is it related to the Tom Cruise flop. This The Mummy is pure nightmare fuel. Lee Cronin has publicly stated that his vision for The Mummy is "dark, scary, and violent." Gone are the campy one-liners; The Mummy (2026) returns to the character's roots as a figure of undead dread. The […]

‘Weapons’ Massive 2026 Horror Epic Promises to Be the ‘Magnolia’ of Scares
The director of Barbarian returns with Weapons, a star-studded horror film arriving January 16, 2026. If there is one director who currently holds the "golden ticket" in Hollywood horror, it is Zach Cregger. After the massive, unexpected success of Barbarian, Cregger was given carte blanche by New Line Cinema to create his dream project: Weapons. Originally slated for 2025, the film has been positioned as the first major horror event of the new year, hitting theaters on January 16, 2026. Weapons is not just a horror movie; it is being described as an expansive, multi-story epic. Weapons features an incredible ensemble cast, including Josh Brolin (Dune), Julia Garner (Ozark), and Alden Ehrenreich (Oppenheimer). The plot of Weapons is being kept under lock and key, but insiders have compared the structure of the film to Paul Thomas Anderson’s Magnolia—meaning Weapons will […]
Into the Fog: Everything We Know About Return to Silent Hill
After nearly two decades, the sirens are sounding once again. Return to Silent Hill, the highly anticipated third instalment in the film franchise, is officially set to bring the psychological horror of Konami’s legendary video game series back to the big screen. Directed by Christophe Gans, the visionary behind the original 2006 cult classic, this new entry promises a faithful and terrifying adaptation of the fan-favorite story, Silent Hill 2. https://www.youtube.com/watch?v=fTPHkslPCr0 The Release: A New Nightmare for 2026 While initially expected earlier, the official domestic release date has been set for January 23, 2026. This places the film at the forefront of the year's horror calendar. International audiences in territories like Australia and Brazil can expect to enter the fog a day earlier on January 22, 2026. The Plot: A Journey of Love and Madness The film adapts the narrative […]
Top 10 Console Games: Horror Games You Must Play in 2026
Top 10 Console Games: Horror Games You Must Play in 2026 From legendary remakes to grotesque new nightmares, prepare your PS5 and Xbox Series X for a golden age of terror. The horror genre is currently enjoying a renaissance. We’ve moved past the era of cheap jump-scare YouTube bait and settled into a rich landscape of psychological dread, complex survival mechanics, and narrative-driven terror. For console gamers, the horizon is looking exceptionally grim—in the best way possible. The next 18 months are stacked with titles designed to make you clutch your controller until your knuckles turn white. We are looking at the return of industry titans, ambitious new IPs from legendary creators, and indie darlings making the leap to the big screen. If you’re ready to lose some sleep, here are the top 10 console horror games coming out soon […]
ILL: From Viral Concept to Brutal Reality – Development & Release Update (2026)
For years, the horror game ILL existed in the liminal space between "too good to be true" and "wishlisted immediately." Known for viral clips featuring hyper-realistic dismemberment and flesh-mutating monstrosities, the project faced years of skepticism. The latest ILL Update brings exciting new details to light. The latest ILL Update showcases the game's evolution and development progress. This ILL Update marks a pivotal moment for fans eager for insights. However, recent updates from late 2025 have fundamentally changed the narrative. No longer just a series of glossy animations, ILL has entered full active production with a major publisher backing it. Here is the latest ILL Update on the body-horror title that aims to redefine the genre. 1. Major Publisher Announcement: The Mundfish Partnership In this ILL Update, the focus is on the exciting partnership that influences gameplay. This ILL Update […]